Bikes are versatile beasts and will carry you through fine weather and foul. But they’ll protest if they’re not kept clean. A dirty bike—specifically, a dirty drivetrain—will eventually wear and give up the ghost. So, cleaning your faithful steed after each filthy ride will be rewarded with improved functioning and reliability for the long haul.
______________________________
by Tamia Nelson | March 18, 2018
Ideally, bikes should be completely cleaned, checked, and lubed after every dirty ride, but in reality this isn’t always possible. Cleaning a bike is a time-consuming and messy job. When you return tired and hungry from a dirty ride, it’s too easy to roll the bike into the garage and forget about it. The trouble with this is that you remember quickly enough the next time you turn to your bike, usually when it’s inconvenient to give it a well-deserved cleaning. Maybe you spray the drivetrain with WD-40 or drip some lube over the rusty, grubby chain and ride away to the sound of grit grinding away the chain and other components. But failure to clean the bike can erode these components into unusability. Not only that, but replacing all the parts is costly.
The moral? It’s worth giving your bikes a quick cleaning as soon as you can after dirty rides, and a thorough scrubbing at least a couple times a year. And that’s just what I did recently when the day wasn’t promising for a ride. Morning dawned warm but overcast, windy, and with a threat of intermittent rain showers. Perfect conditions for cleaning off a winter’s accumulation of grime from my utility bike, an alloy-framed Schwinn Sierra. The drivetrain was gungy with grit and tarry old oil, the fenders were greasy from road spray, splotches of lube had splattered the alloy wheel rims, and the frame was lackluster.
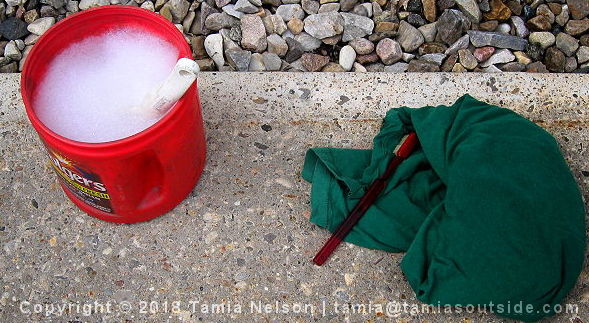
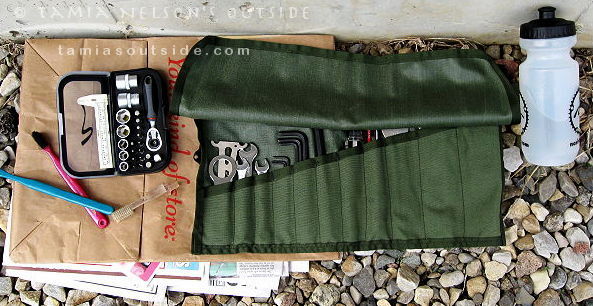
To make the job run smoothly, I spread the tools and cleaning supplies outside, then rolled Sierra into the open air. I filled my trusty recycled coffee can wash basin with hot sudsy water (I use dish detergent), laid out the scrub brush and a couple old toothbrushes, along with newspaper, a large brown bag (it makes a clean surface to place tools in use), and clean rags recycled from worn t-shirts. I filled a water bottle so I wouldn’t get thirsty in the hour or two I’d be outside, grabbed a pair of latex gloves to keep the worst of the grime off my hands, and weighed down the lightweight things so they wouldn’t blow away in the wind.
I prepared the bike by lifting the rear wheel in a handy small workstand. The first thing I had to tackle was the drivetrain, which was the dirtiest part of the bike. Cleaning it splatters the rest of the bike with crud, so it makes sense to do it first.
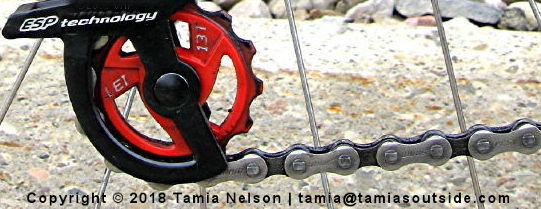
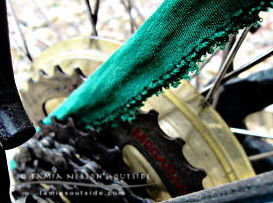
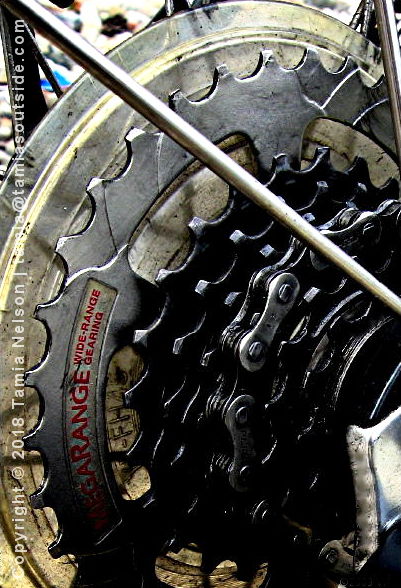
A thorough cleaning of the drivetrain requires removing the rear wheel, removing the chain, removing the freewheel or cassette, and cleaning each component completely. That’s something I usually do once a year, but this time I cleaned the drivetrain while it was intact on the bike. I checked the chain with a Park Tools chain checker to be sure it was still serviceable. If the chain had been badly worn, I’d have removed it and not bothered cleaning it. Much easier to clean the drivetrain without a dud chain, then put the new chain on after everything else is cleaned. Next, I sprayed the drivetrain’s components with WD-40, protecting the tires and frame by holding a folded newspaper between them and the chain, crank, and cogs as I sprayed. The hems of old t-shirts are great for getting down between the gears of the freewheel:
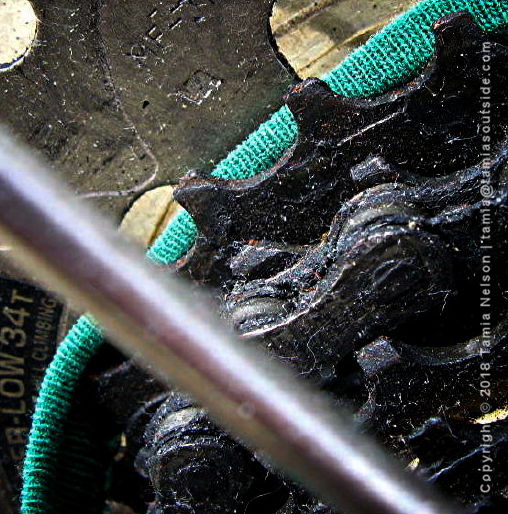
Holding the cloth taut in both hands, I rubbed it deep between the gears to dislodge grime, running the gears round as I scrubbed. As the cloth became foul, I replaced it. Lengths of about seven inches are perfect. Spraying WD-40 between the gears as needed to moisten the grime helps speed up the job, but don’t use too much or it drips and is wasted.
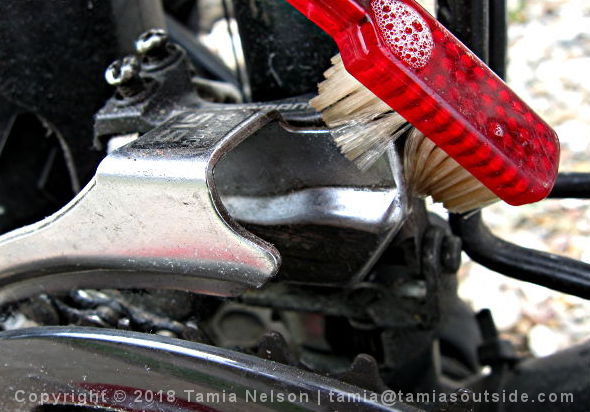
After the first pass cleaning the freewheel, I turned to the rear derailleur. With small squares of clean rag and a toothbrush, I cleared out the cage, jockey wheels, and the body. The crankset was next, and here, too, the strips of t-shirt hem are useful for cleaning between the three rings as well as the spindle between the bottom bracket shell and crank arms. I then wiped off the front derailleur, and scrubbed it with a toothbrush dunked into hot sudsy water.
The chain came next, and for that I used a Park Tools CM-5 Chain Scrubber with a WD-40 bath in its reservoir. (I don’t have a photo of that part of the cleaning job because it’s messy and requires three hands.) WD-40 has become my drivetrain cleaner of choice after trying a variety of other cleaners, from orange degreaser to proprietary cleansers. It’s relatively inexpensive when bought in bulk, and it’s handy for plenty of other uses. It’s simply the best I’ve found.
I shifted the gears onto the middle ring and middle cog, and ran the chain backwards through the chain cleaner for 50 cycles. Why 50 cycles? It’s easy to remember. After 50 runs, the chain was clean, but if it had still been dirty, I’d have poured the filthy WD-40 into the storage container, poured clean WD-40 into the chain scrubber’s reservoir, and run the chain through for another 50 cycles. That’s usually enough to take care of the dirtiest chain. With the chain now clean, I ran a fresh clean rag over and between the freewheel gears again, made a final check of the rear and front derailleurs as well as the crankset.
With the drivetrain done, I could turn my attention to the rest of the bike. The wind helped dry the drivetrain as I used sudsy water to clean the bike from top to bottom. I use rags, toothbrushes, and a large scrubbing brush depending on the area I’m cleaning. I try not to allow water to drool down into hidden areas within the bike or cables.
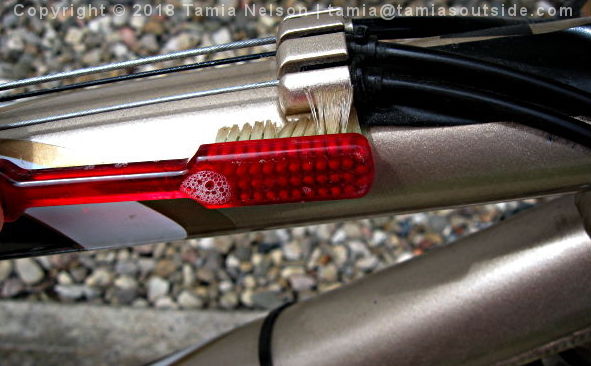
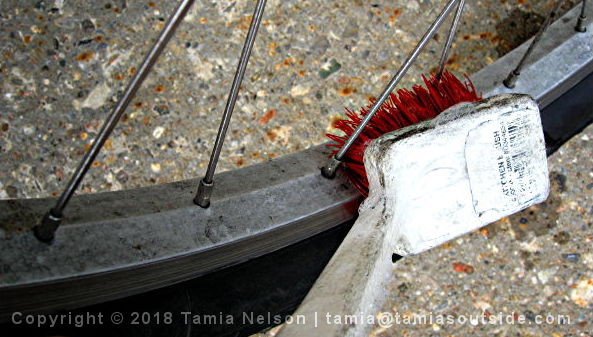
Cleaning the bike affords a good opportunity for inspecting it. Rusty cables, frayed cable ends, cracked cable sheaths, chips in the paint, and other problems can be noted and repaired. Brake pads are cleaned by rubbing a cloth over the business side after opening the cable quick release. I eyeballed the pads for wear, but they were fine and didn’t need replacing. The wheel rims and tires were the last parts I cleaned, but only after inspecting the tires for cuts, cracks, and wear. While scrubbing, I also looked to see if the wheels were true—spin them while watching the rim pass between the brake pads, and if true, the rims won’t wobble side to side or hop up and down. I also checked that the hubs were sound by grasping the rims and pulling side-to-side. If the cones were loose or bearings breaking down, I’d have felt the wheel shift, but neither did.
Once the bike was completely swabbed, I wiped it down with a clean, dry rag and stood back to see if I’d missed anything. Didn’t look like it. The drivetrain wasn’t pristine but it was free of gunge, and thanks to the stiff breeze, it was also dry and ready to be lubed.
I put a single drop on each side of each chain link’s pair of rollers. Then I put single drops of oil into each derailleur hinge point, finishing up with a lube of the hinges on the linear brake arms, as well as a bit of lube into the freewheel—this requires the bike be laid over on its left side so the oil can penetrate into the freewheel. After spinning the crank and running the drivetrain through all the gears, I worked the brakes a few times to make sure lube had penetrated the hinge points. Finally, I checked all bolts and fasteners, and then admired my handiwork. Sierra was ready for her next ride, and I was pleased she looked so good after 8,000 miles of hard use in all weathers.