
Do you have trouble finding your tools when you have to do a roadside repair? Then you need a tool roll. The good news? You can make a custom one for yourself, and it need not cost a cent. Tamia shows you how.
______________________________
by Tamia Nelson | 24 January, 2018
When I head out on trips that will take me more than an hour’s hike from home — and that’s most of the trips I take — I carry a roadside repair kit in addition to my seat-pack tools and the rest of my cycling gear.
For a long time I carried tools in my handlebar bag, tucked away inside a plastic freezer bag. This wasn’t ideal. The tools rattled with every bump. More importantly, they weighed in at 2 pounds 4 ounces — about as much as a full quart water bottle. That’s a lot of weight to add to an already overloaded bar bag. I needed to find a better way. Luckily, I always mount a rack trunk or small pannier on my bike for longer rides, and either one would easily accommodate my tools. But I also wanted something better than a freezer bag to contain them. I wanted a tool roll.
Now it so happens that I own lots of tool rolls, in a full range of sizes, but they’re mostly made from heavy canvas. Moreover, every one is already in use. The upshot? I sat down at my sewing machine. It’s not my favorite seat — I’m no seamstress — but the job didn’t take long.
First, I drew what an engineer would probably call a concept sketch:
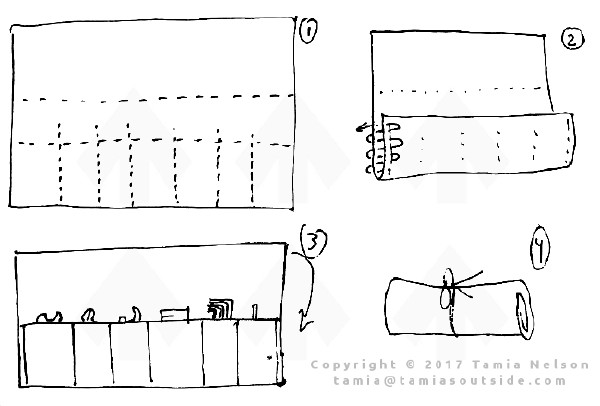
Then I outlined the work flow:
- Hem the rectangle of fabric (keeps it from unraveling)
- Fold up the bottom
- Stitch individual tool compartments
- Pat self on back (optional, but recommended)
All that remained? Load and go:
- Slide tools into place
- Fold flap over
- Roll up
- Tie securely
I figured I could handle this sewing project, even if I’m not exactly the Tailor of Gloucester. I’d only have to sew straight lines, after all.
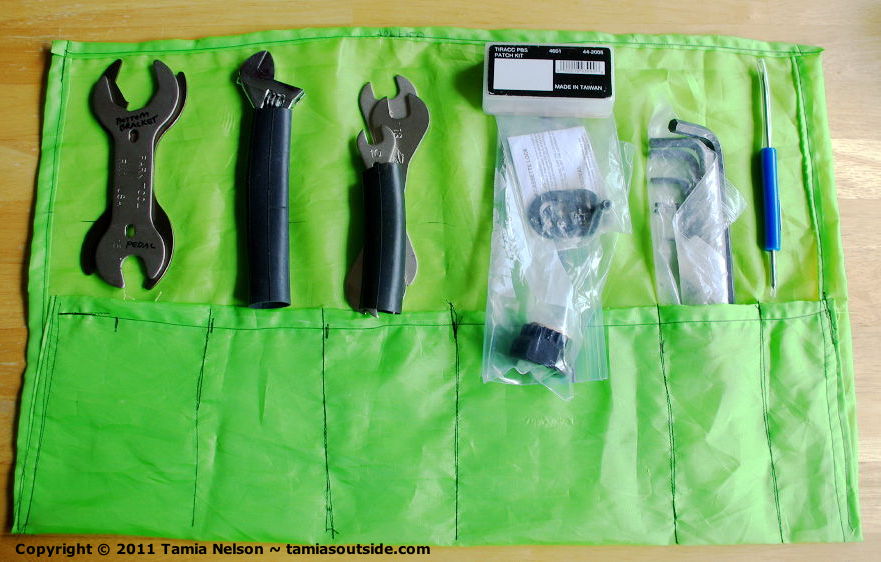
For fabric I chose to recycle a hi-viz nylon stuff sack I found on the verge of the road. (These strip landfills that do double duty as New York’s state highways are a never-ending source of swag for the resourceful cyclist.) I’d used some of that stuff sack already to customize my ill-fitting Performance Transformer jacket, but there was plenty of material left over to make a tool roll. The first step was easy. I flattened the nylon material on my work table and laid my tools on top of it. Now I knew just how much fabric I’d need.

As the photo above suggests, I’d originally planned to store my spare brake and derailleur cables with my tools, but that would have made the roll hard to fold and could have deformed the cables. They would go into my bar bag instead. They weigh almost nothing, after all.
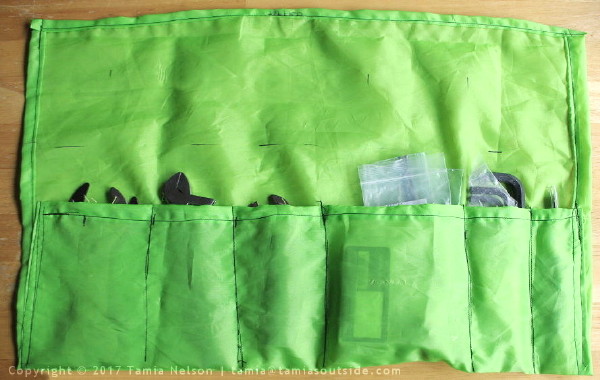
Next, I traced the borders of the compartments with a laundry marker. Then I cut the fabric to size and hemmed the edges. After that, all that remained to do was to fold the bottom third of the rectangle up, close the sides, and stitch the individual compartments. (I backstitched at the openings to stop the stitches from unraveling.) That was that. It was time to put the tools in place:
A length of nylon cord — another bit of treasure trove from the highway recycling center — secures the roll:
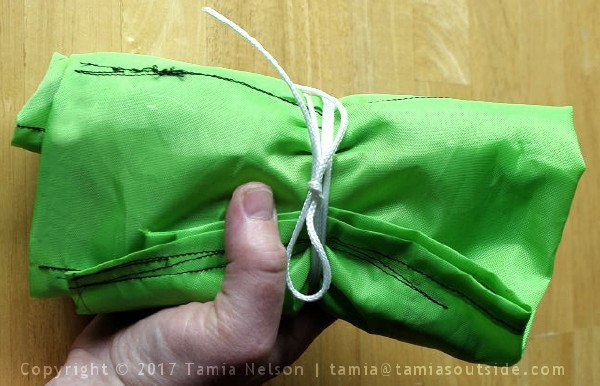
Bottom line: My new tool roll may not be elegant, but it’s surely a cut above a freezer bag. The garish color has two unplanned benefits. First, I’m not likely to leave it behind after finishing a roadside repair. Secondly, the color contrasts well with tools and small parts like fasteners, making it less likely I’ll lose sight of them while making a repair. And as a bonus, it matches my riding jacket. Function and fashion rolled up in one tidy package. What more could anyone ask?
