Fixing flats isn’t entirely straightforward. Neither is changing tires. So I made a checklist to help me avoid some of the more obvious pitfalls.
______________________________
by Tamia Nelson | September 30, 2014
I don’t get many flats, so about the only time I have to change tubes is when I swap my utility bike’s Conti Town & Country rubber for my Innova Tundra Wolf studded tires. And because I get so little practice, I neglect two fundamental steps in the process almost every time I do the job: (1) I forget to deflate the front tire before starting work, and (2) I fail to release the cable on the linear brake. The result? I can’t get the wheel off. It doesn’t take me long to put things right, of course, but I reached a point where I didn’t want to continue repeating these two blunders. So I made a checklist to guide me in future. Here it is:
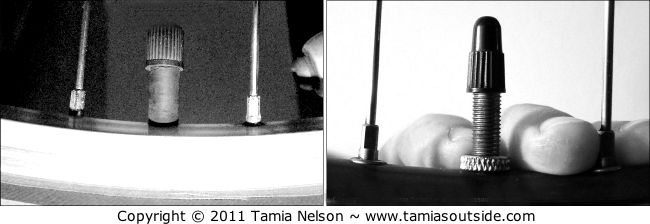
Size Matters All inner tube are not created equal, and I recently discoverd that, although I’d been carrying a correctly sized spare tube for my Surly Long Haul Trucker’s 26-inch Alex wheels, the tube had a Schrader valve, not the required Presta valve. Luckily, I made this discovery at home, not 50 miles down the road. Had I gotten a flat somewhere back of beyond, and had it been impossible to patch the tube, I would have faced a long walk back. Why? Simple. While it’s possible to fit Presta valves in rims drilled for Schraders, you can’t squeeze a fat Schrader valve through the hole for a skinny Presta, and my rims are drilled for Presta valves.
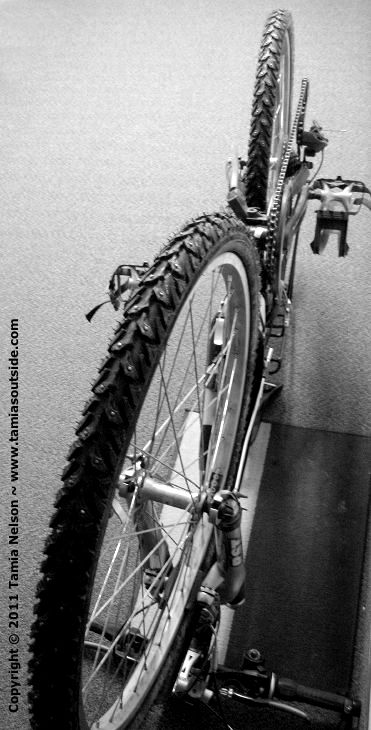
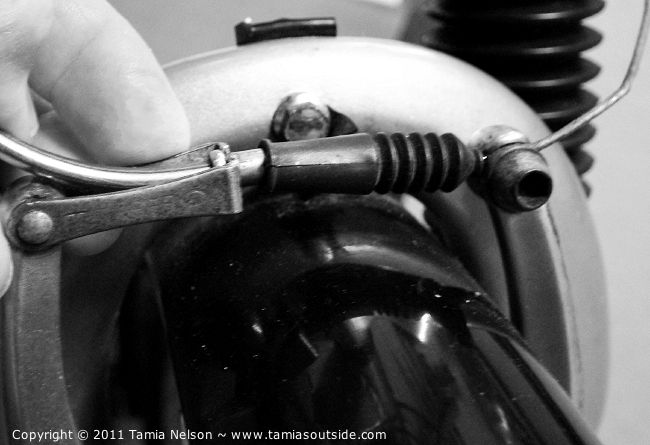
Don’t Forget to Loosen the Brake Quick-Release OK. This isn’t rocket science, I know, but I find that I almost invariably forget to do it, especially if more than a couple of months has elapsed since I last removed a wheel. But at least it’s an easy oversight to correct.
Deflate Before Removing Not a problem if you’ve just had a flat, obviously. But easy to forget if you’re swapping a tire. Skinny tires usually slide through the gap between brake blocks easily—if you’ve remembered to loosen the quick-release, that is—but fat tires often bind.
Glove Up This is most important if you’re working on a rear wheel. Chains and cogs are dirty, and you’ll be handling both. The grime doesn’t stay put, either. It will quickly transfer itself to your bars, shifters, and clothes. A pair of vinyl or latex gloves keeps your hands (and your clothes) clean. Carry them in a sandwich bag with a square of paper towel. When you’ve finished the job, just wipe the gloves with the towel, peel them off your hands (wiping them first minimizes the amount of grime transfered to your fingers in the process), and then place both gloves and towel in the sandwich bag for disposal at home.
Shift Into High Gear When you’re working on the rear wheel of a derailleur-equipped bike, things go a lot more smoothly if you shift onto the small cog before you remove the wheel. (It often helps to be on the small chainring, too. This isn’t a combination you’ll want to use while riding, but it gives you the greatest amount of slack to work with when removing the wheel.) Once you’ve got the chain on the small cog and loosened the wheel’s quick-release, just ease the derailleur cage back out of the way with one hand while pulling the wheel free from the dropouts with the other. It doesn’t always go smoothly, but as with most things, practice makes perfect.
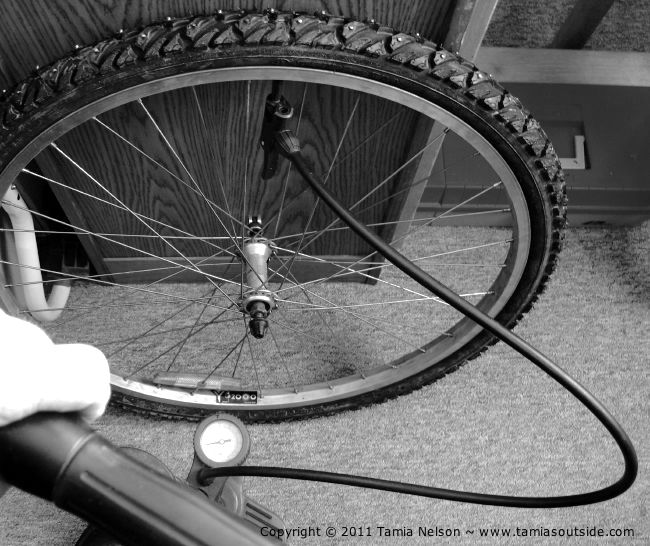
A Little Puff Will Do You When you’re ready to fit a repaired tube or a spare on a wheel, give it a couple of puffs with your pump first. Don’t overdo this, though. You just want the tube to have a little shape.
Alignment is Critical When inserting the tube, make sure the valve is perpendicular to the rim. Then make certain it stays that way as you inflate it.
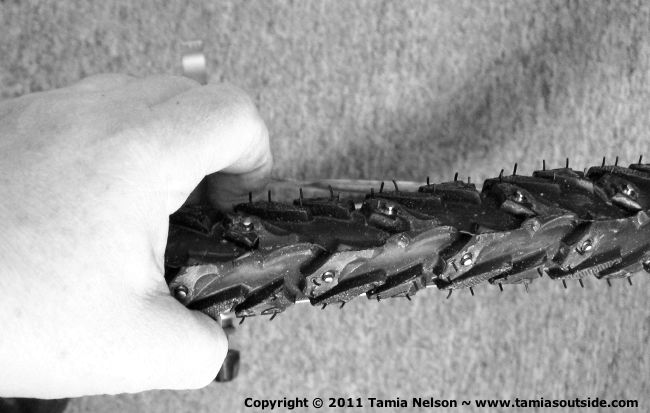
Don’t Pinch! It’s best to mount tires on rims without using levers. And never allow any part of the tube to be trapped between the tire bead and the rim. (There’s no better way to get more practice fixing flats.) To make sure that everything is as it should be, squeeze the tire sidewalls toward the central well and eyeball the junction between tire and rim on both sides—before you begin inflating the tire.
Easy Does It It’s best to inflate a tire just enough to hold its shape before replacing it in the dropouts. Finish the job only after you’ve tightened the axle quick-releases. Wide tires often won’t fit between the brake blocks when fully inflated, even if you do remember to loosen the brakes fully. Then you’ll have to let almost all the air out, fit the tire, and pump it up again. This isn’t a happy prospect if you’re 50 miles from home. Just ask Farwell. He had to go through the whole drill two times, halfway into a century. (He says he’s a slow learner.)
Weighty Matters After you’ve fitted a new or repaired tire and inflated it, loosen the axle quick-release just a little and put your weight on the wheel. Then tighten the quick-release again. This seats the axle and centers the wheel between the brake blocks. Done? It’s time to…
Put It to the Test Close the brake quick-release, lift the bike, and spin the wheel. It should rotate freely, without rubbing on brake blocks or frame tubes. If it does rub, however, just loosen the quick-release and re-center the wheel. Everything OK? Then…
Pack Up Tuck the sandwich bag with your grimy gloves away in jersey pocket for later disposal. Roll up the leaky tube and stick it in another pocket. (You can patch it later and reuse it.) Look around to make sure you haven’t left anything—pump, water bottle, tire levers—on the ground. Now…
Roll Away You’re good to go. But be sure to test your brakes before you need them.
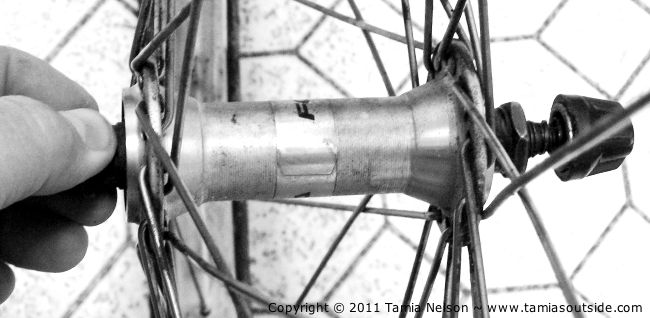
Home Front When changing tires back at base, take time to clean the hard-to-reach places. I run a clean rag between the cogs of the freewheel or cassette, as well as scraping any gunge that’s accumulated around the gap between the freewheel and the axle.
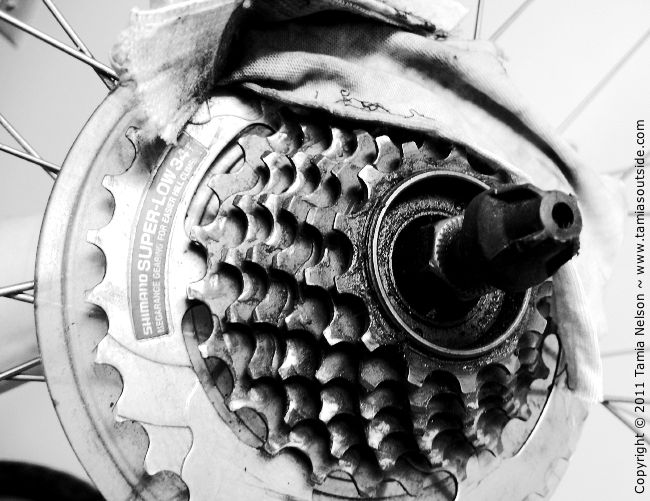
I also wipe off the hub and spokes, and clean the dropouts. And while I’m at it, I check the cones for excessive play or binding, making any necessary adjustments. If I feel grit in the hubs when I spin the wheel while holding the ends of the axle, I know it’s time for an overhaul. Oh, happy day…
A word of warning: I wrote up this checklist to help me avoid mistakes I’ve made in the past. It’s not intended as a comprehensive guide. The best way to learn the art of fixing flats (or changing tires) is to do it under the watchful eye of a competent mechanic. And it’s a skill every cyclist should acquire early on in his (or her) career. You can’t call AAA for help if you get a flat on the road, can you? So you’re on your own. Luckily, that’s the way most cyclists like it. For us, every day is Independence Day.