
Are you planning on mounting a one-legged kickstand on your bike? Then read this first.
______________________________
by Tamia Nelson | August 19, 2014
I like my bikes to have kickstands, and when it comes to choosing a bike support, my preference is for basic Greenfield one-legged stands. I tried the Pletscher two-legged stand for a year, but just could not love it. So I swapped it out for a basic model:
Most cyclists will be familiar with this simple accessory. The clamp consists of a knobby bottom plate and a level, smooth top plate, and a bolt which squeezes the two plates together over the chainstays.
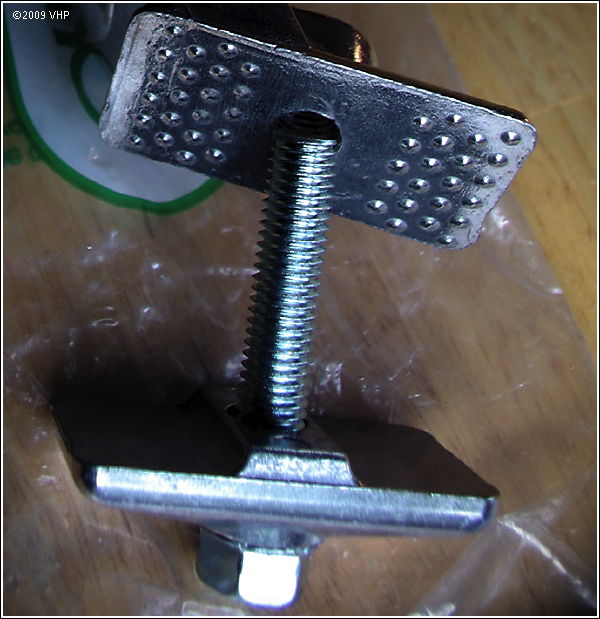
It isn’t elegant, but this clamp grips the LHT’s stays securely (better than the Pletscher’s beveled clamp).
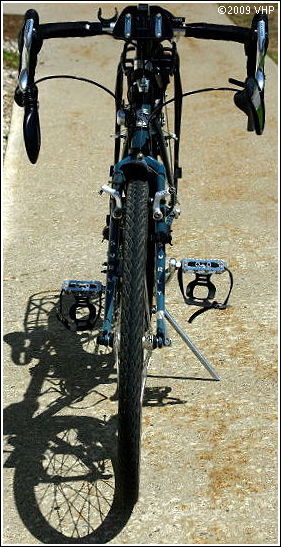
To mount the stand on the bike, I wrapped old inner tube around the stays and secured them with strips of electrical tape, then aligned the folded leg with the stay so that it wouldn’t rub against the wheel or be struck by the pedal.
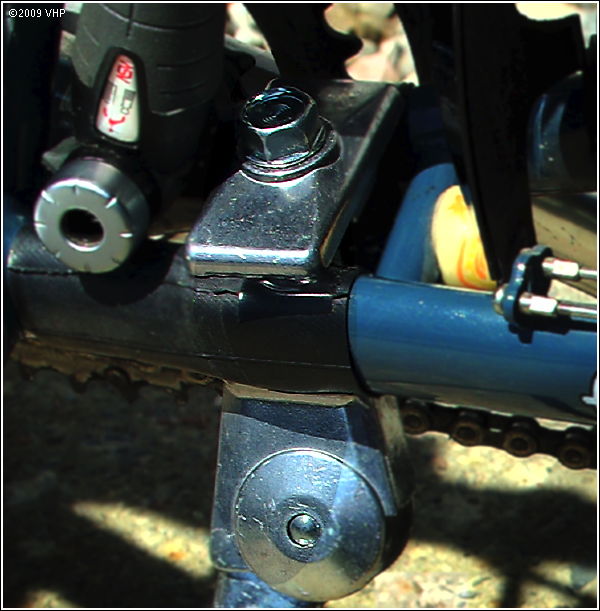
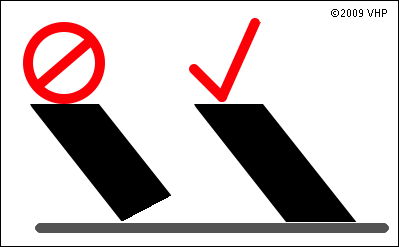
The Greenfield’s leg was too long to allow my LHT to lean at a comfortable angle when parked on level ground, so I used a hacksaw to cut the kickstand back. I mounted the kickstand right out of the bag and parked the bike on the sidewalk to get an idea how much to remove from the leg. Gingerly I let go of the bike—it stood almost erect, with the slightest lean toward the kickstand—and got onto my belly in front of the bike to eyeball the foot. With a laundry marker, I scribed a rough line on the foot to indicate where I wanted to cut. I removed the kickstand, clamped it in a vise, and used a hacksaw to remove about one-quarter inch of alloy bar. I noted that the guide marks molded into the kickstand leg are scribed at the wrong angle. I learned that only after following the guides and remounting the kickstand. What that meant was that all the bike’s weight rested on a sharp edge rather than on a flat plane, as shown by the schematic drawing to the left in the diagram below.
Back to the vise, where I sawed a triangular wedge off the kickstand to set the proper angle. After a few swipes with a metal file, I was satisfied that the foot was as good as I could make it.
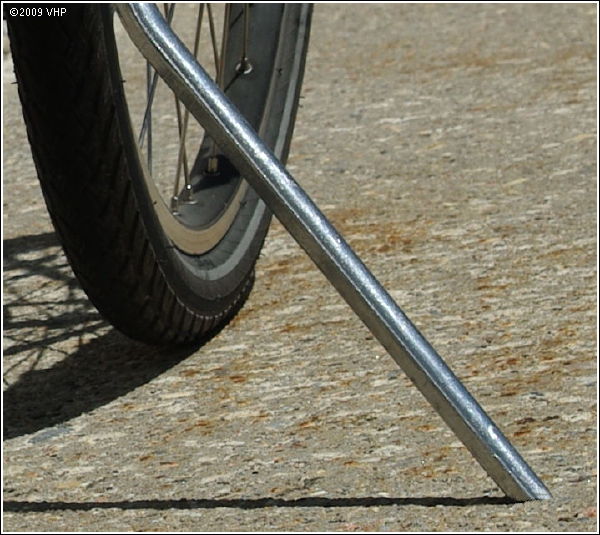
That’s all there was to it. Sawing the leg to the correct length and mounting the kickstand took me less than an hour, and would have taken even less time if I hadn’t messed up the first cut and if I hadn’t needed to rewrap the stays with rubber tubing. Now after five years and over 12,000 miles, I’m happy with my decision to use the one-legged kickstand. It supports the load securely when the bike’s parked, even on soft sand…
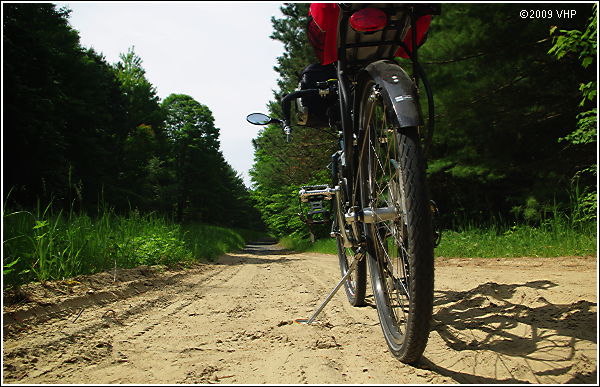
…and also in loose gravel, especially when I use a kickstand plate for additional support.
If you’re not pleased with the two-legged kickstand you’ve mounted on your bike, consider replacing it with a single-legged kickstand. A trial run will cost you less than buying a “deluxe top plate” for your Pletscher, and you might find—as I have—that your bike is more stable on the one leg.
